
The story: I needed some thin, lightweight CD envelopes. Sure, I could have bought them, but I didn't want to spend good money on something so fragile. And besides, the store was far away. If only I could make my own... Then I remembered, I had made my own! Years ago, when I was stuck in the desert, I had to invent ways to kill the time; an origami CD envelope was one such project.
I unfolded my only existing model, and reverse-engineered the process to make these directions. These pictures were taken with a cell phone camera. Yes, the picture quality is horrible, but life is pain, okay? Don't be such a joyless potato. Onward!...
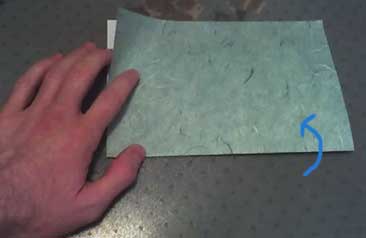
This is the paper I'm using. One side is colored, the other is white. Begin with the paper oriented the "tall" way, short edge on top.
|
|
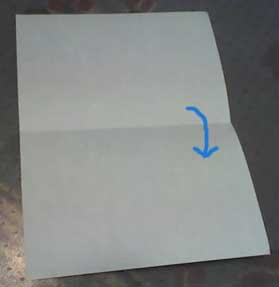
1. Valley fold the paper in half. Make a gentle crease, then unfold.
|
⇒ |
|
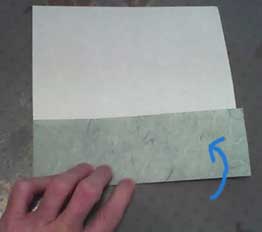
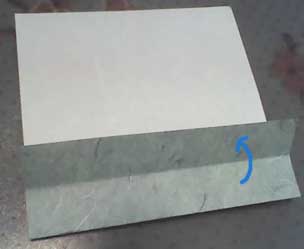
2. Valley fold the bottom edge up to the crease you made in step 1.
|
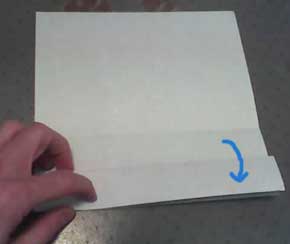
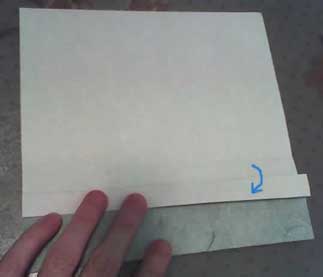
3. Valley fold the paper's edge down to the crease you made in step 2. Make a gentle crease, then unfold.
|
⇒ |
|
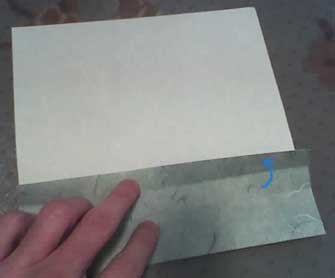
4. Now valley fold the paper's edge down to the crease you made in step 3. Again, make a gentle crease, then unfold.
|
⇒ |
|
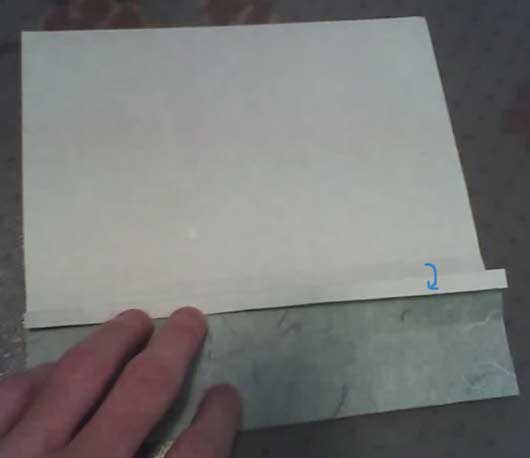
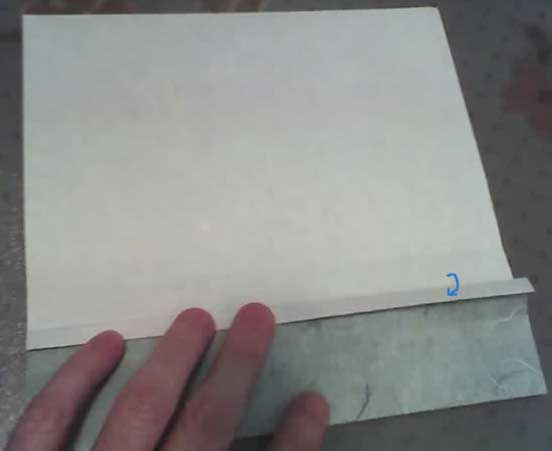
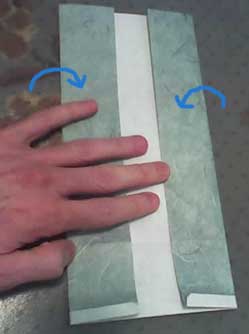
5. Fold the paper's edge down to the crease you made in step 4. Don't unfold this one!
|
6. Re-fold along the crease you made in step 4. This makes a thick ribbon of paper (my fingertips are touching this in the picture.)
|
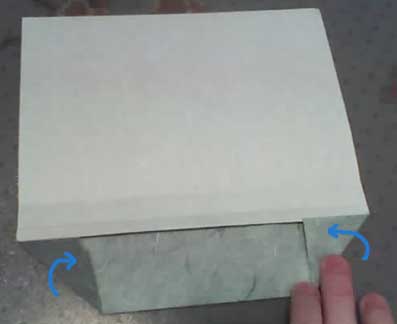
7. Valley fold the bottom corners up along 45-degree angles, so that they touch the bottom of the thick ribbon. Crease well. (If you want your envelope to have a snug fit, fold these corners up a bit higher, so the corners overlap the thick ribbon a little.) Then unfold.
|
⇒ |
|
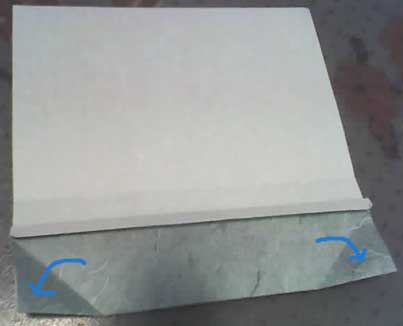
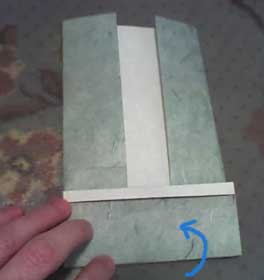
8. Valley fold the left edge at a 90-degree angle; The fold begins at the 45-degree crease you created in step 7. Crease well. Repeat with the right edge. Then unfold these.
|
⇒ |
|
9. Unfold the crease you made in step 2. Don't unfold the ribbon of paper you made in steps 3-6.
|
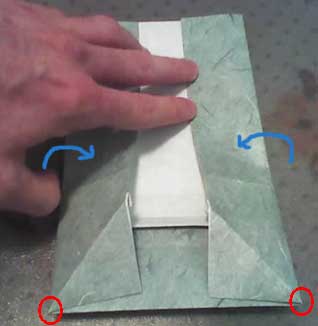
10. Re-fold the creases you made in step 8.
|
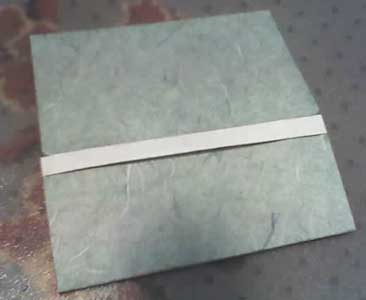
11. Re-fold the crease you made in step 2. Ah ha, now it's beginning to look like a finished product.
|
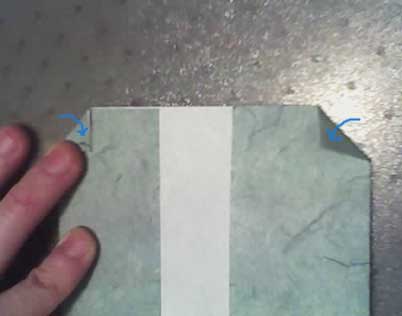
12. I hate arbitrary folds in origami instructions, but unfortunately, here is one. Valley fold the top corners down at 45-degree angles. You want your triangles to be about twice the height of the thick ribbon.
|
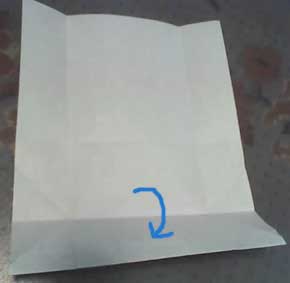
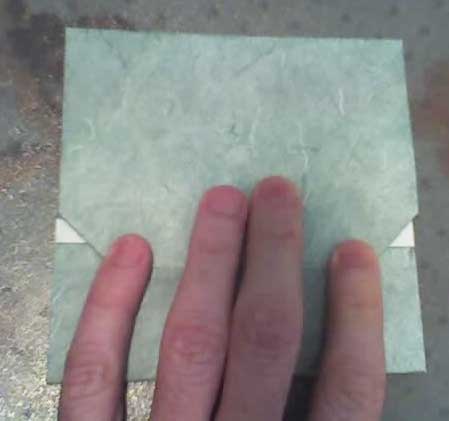
13. Valley fold the top down to make the flap. The ribbon should just peek out from behind the triangular folds you made in step 12. At this point, you should be able to tuck the flap into the pocket!
|
⇒ |
|
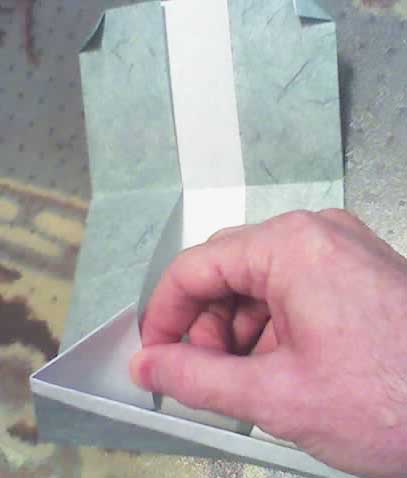
14. At this point, you have a functional CD envelope. However, there's one more step that will make the design more rigid. Unfortunately, it's a 3D maneuver, which is tricky to express on a 2D web page.
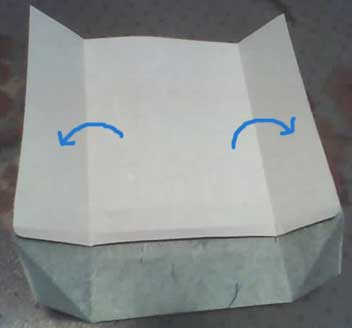
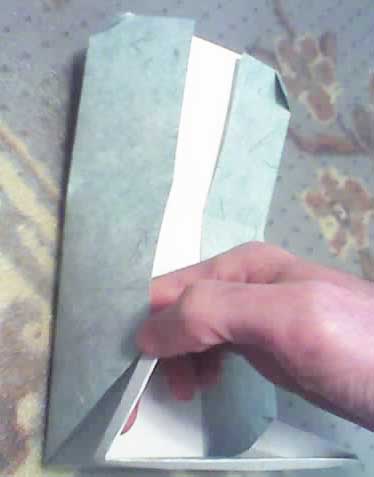
Carefully open the pocket; there should be a corner of paper folded up inside. (This is what I'm grabbing in the diagram.) It should have some 45-degree creases in it; you made these way back in step 7.
|
Fold this corner back, along its 45-degree creases. Tuck it under the left side. (Here are two different camera angles of the process in action:
|
↻ |
|
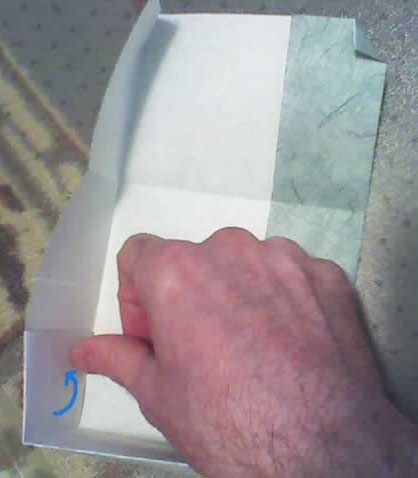
Repeat the process on the right side. The pocket should now look like this:
|
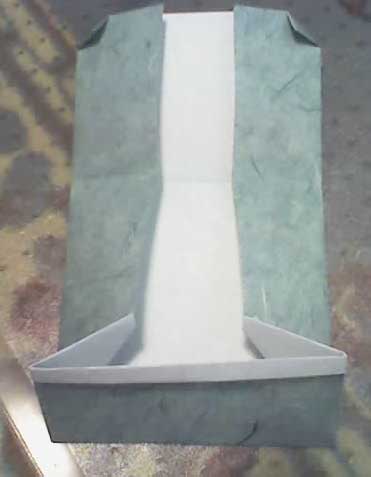
15. You're done! Stick a CD in the pocket, and tuck in the flap.
|
⇒ |
|
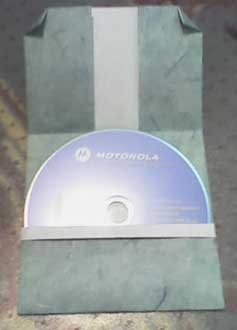
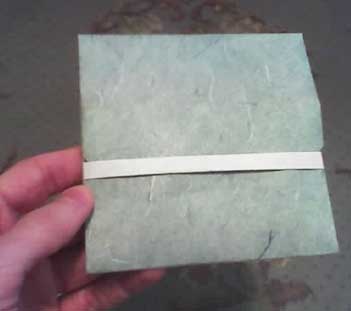
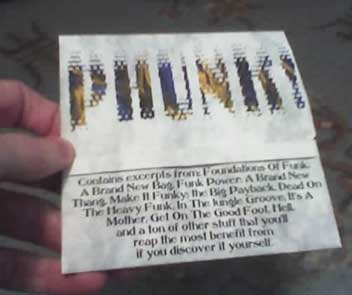
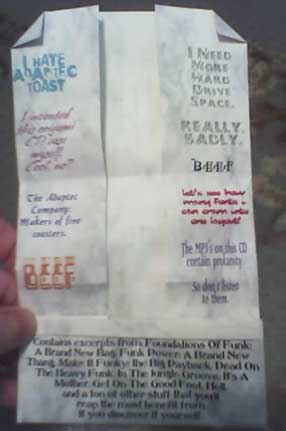
Yes indeed, you can print your own artwork, and fold a CD sleeve with it. Here's the one I made so many years ago:
|
|